
Cloudflare workers allow you to interfere with and change requests and responses. The workers are javascript code ("serverless logic") that executes on the CDN edges.
Cloudflare workers can be used to integrate ImageEngine on your site by creating a worker that will "filter" the response of every page and make sure any image reference is changed to the ImageEngine delivery address.
Preparation
- Register a delivery address in the control panel at control.imageengine.io. This delivery address will get a canonical name like “xxxyyy123.cdn.imgeng.in”.
- Configure this delivery address with the actual origin where your original images are located (usually your website domain).
- Verify the setup by accessing one of the images on your website like this: xxxyyy123.cdn.imgeng.in/path/image.jpeg
- xxxyyy123.cdn.imgeng.in will be used in the Cloudflare setup as the origin for images.
Cloudflare worker configuration
Log on to dash.cloudflare.com and go to the Workers section, and hit the "Create new Worker" button.
In the editor shown, paste the flowing code:
/**
 * Provide the hostname currently serving images.
 * The script will replace this with the ImageEngine delivery address
 */
const CURRENT_IMG_HOST = "foo.com"

/**
 * Provide the ImageEngine delivery address.
 */
const IE_DELIVERY_ADDRESS = "xxxyyy123.cdn.imgeng.in"

async function handleRequest(req) {
  const res = await fetch(req)
  return rewriter.transform(res)
}

class AttributeRewriter {
  constructor(attributeName) {
    this.attributeName = attributeName
  }
  element(element) {
    const attribute = element.getAttribute(this.attributeName)
    if (attribute) {
      element.setAttribute(
        this.attributeName,
        attribute.replace(CURRENT_IMG_HOST, IE_DELIVERY_ADDRESS),
      )
    }
  }
}

const rewriter = new HTMLRewriter()
  .on("img", new AttributeRewriter("srcset"))
  .on("img", new AttributeRewriter("src"))

addEventListener("fetch", event => {
  event.respondWith(handleRequest(event.request))
})
Hit the "Save and Deploy" button. The worker will be given a name.
Next, on your Workers page, click the "Add Route" button. Here we're specifying when our worker will execute. Make sure the "Route" expression matches all requests that you would like ImageEngine to serve images on. Lastly, make sure you select the worker created in the previous step.
Hit Save.
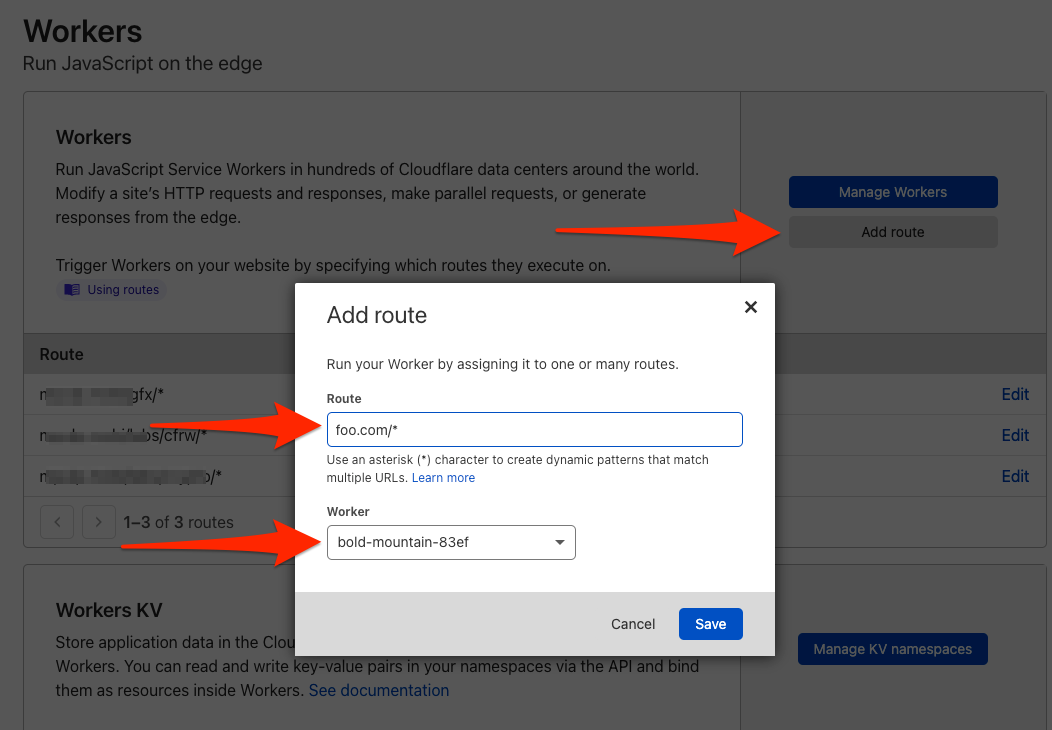
In the screenshot above, all requests to foo.com/* will have the response "filtered" with the selected worker.
Test the setup by inspecting the image urls on your webpage.
Comments
0 comments
Please sign in to leave a comment.